 |  |
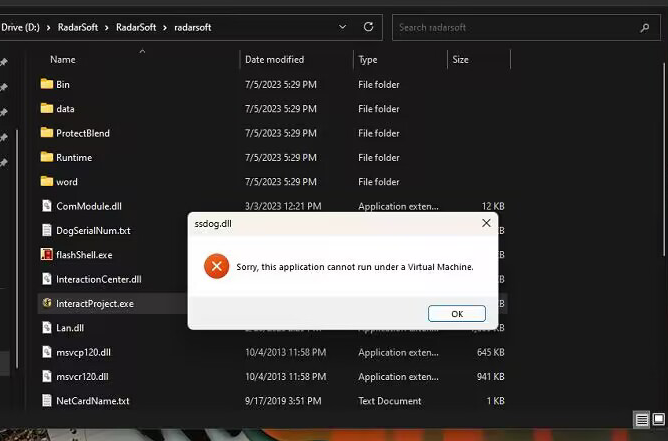
1. When the software runs, an error message appears containing a description related to "Virtual Machine."
2. Alternatively, the software remains stuck on this black screen.
The solution is as follows:
Open the control Panel ->Programs and features->turn windows features on or off

Cancel the checkbox of the next following two items
Hyper-V

Virtual machine

After that, restart computer.
How to Disable Virtualization Settings in BIOS:
To disable virtualization features in the BIOS (Basic Input/Output System) settings of your computer, the specific steps may vary depending on the brand and model of your computer, but here are the general steps:
1. Turn off your computer, then turn it back on and enter the BIOS interface. Typically, you need to press the DEL, F1, F2, or F10 key to enter the BIOS interface (the specific key may vary depending on the brand and model of your computer, please refer to your computer manual for confirmation).
2. In the BIOS setup interface, navigate to the "Advanced Menu" or similarly named tab, and then look for settings such as "CPU Configuration" or "Chipset Configuration."
3. Locate "Virtualization Technology," this option may be named VT-x, AMD-V, or Intel Virtualization Technology, select it and set it to "Disable."
4. Confirm the changes and save the BIOS settings. The way to do this may vary slightly depending on the brand or model of your computer, but generally, you can use the "Save and Exit" or similar option under the respective tab to save the modifications and exit the BIOS interface.
5. Finally, restart your computer to apply the new BIOS settings.
Different brands of motherboards and laptops can include virtualization features. | |
| Gigabyte Motherboards: Look for the BIOS Features tab. Options like Intel Virtualization Technology (and sometimes **VT-d) are available and relatively easy to enable. | Laptops with InsydeH20 BIOS: Navigate to the Configuration tab. |
 |
|
| ASUS Motherboards: Check under the Advanced section, or under Advanced > CPU Configuration. | Dell Laptops: Certain models have a **Virtualization Support** section. |
|
|
Other BIOS Options: In many cases, virtualization-related settings are found under the Advanced Configuration tab, sometimes requiring further navigation into submenus like CPU Features or CPU Configuration.  | |
content is empty!
Copyright© 2013 KLEADER LTD All Rights Reserved | Sitemap