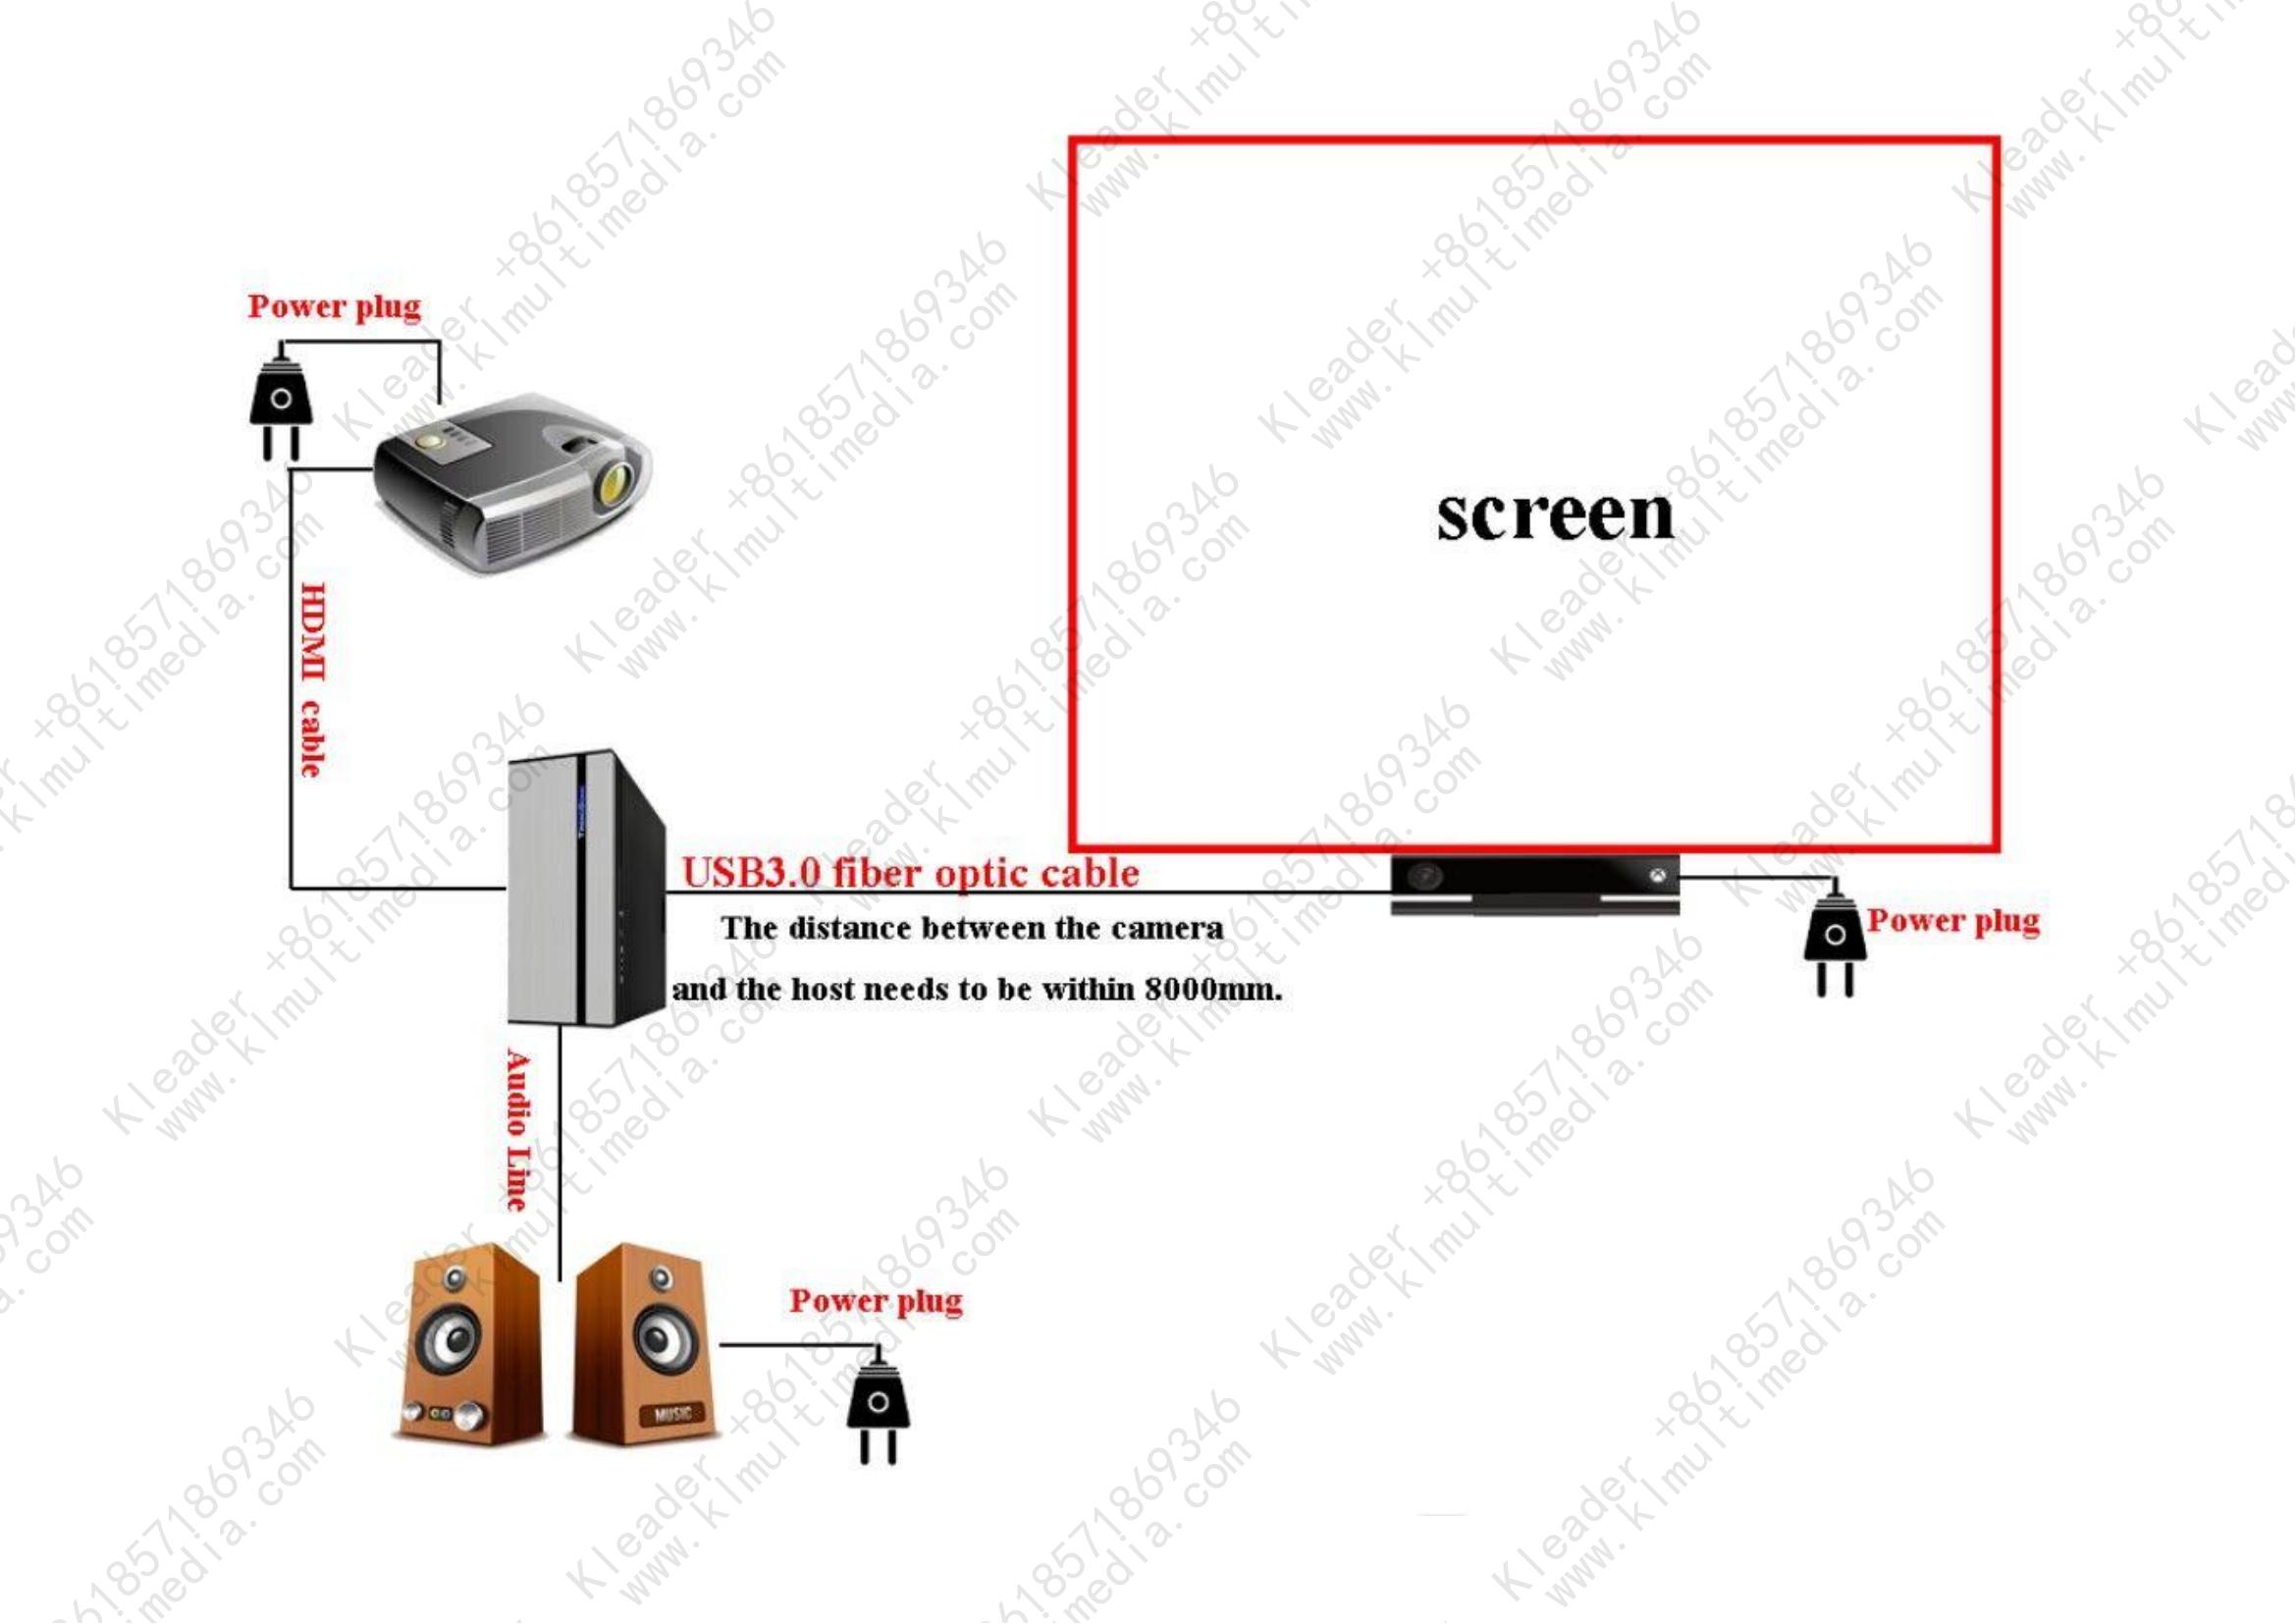
Above is our Kinect 2.0 installation, debugging and usage demonstration video! In this video, we'll provide you with detailed instructions on how to properly install, debug, and get the most out of Kinect 2.0, a powerful depth-sensing camera that brings new possibilities to your interactive experiences. Detailed demonstration of how to properly connect Kinect 2.0 to your computer. This includes connecting the USB and power cables to ensure Kinect 2.0 is powered and connected to the computer.
Shows how to install the Kinect 2.0 driver to ensure your system can correctly recognize and use Kinect 2.0.
1. kinect2.0 minmum configuration for pc
To use Klnect2.0, your computer needs to meet the following minimum configurations in order to use it properly. Firstly, your CPU must be I5 or higher, with a minimum of 8GB of running memory, a standalone graphics card with 1050TI or higher performance, a Win10 or higher system, and a professional version. It cannot be a home or other version.
2 .How to install and debug kinect2.0
Firstly, the following materials need to be prepared: 1. Power adapter 2. One USB3.0 connector 3. An appropriately long Ethernet cable 4. A height adjustable bracket. The first step is to install the power adapter. Open the packaging and install the socket one by one to assemble the power adapter. Then connect the power supply to Klct2.0 and connect it to the network cable via USB 3.0. Finally, connect the other end of the network cable to the computer.
3.How to install the Multiple Kinect Tutorial
We often encounter the problem of using a Kinect recognition range that is too large to cover, so we need to use multiple linkage controls. In this case, we can use switches and network ports to achieve LAN linkage control to meet the requirements.

![]() Kinect 2.0 instruction guide.pdf
Kinect 2.0 instruction guide.pdf
content is empty!
Copyright© 2013-2026 KLEADER LTD All Rights Reserved | Sitemap