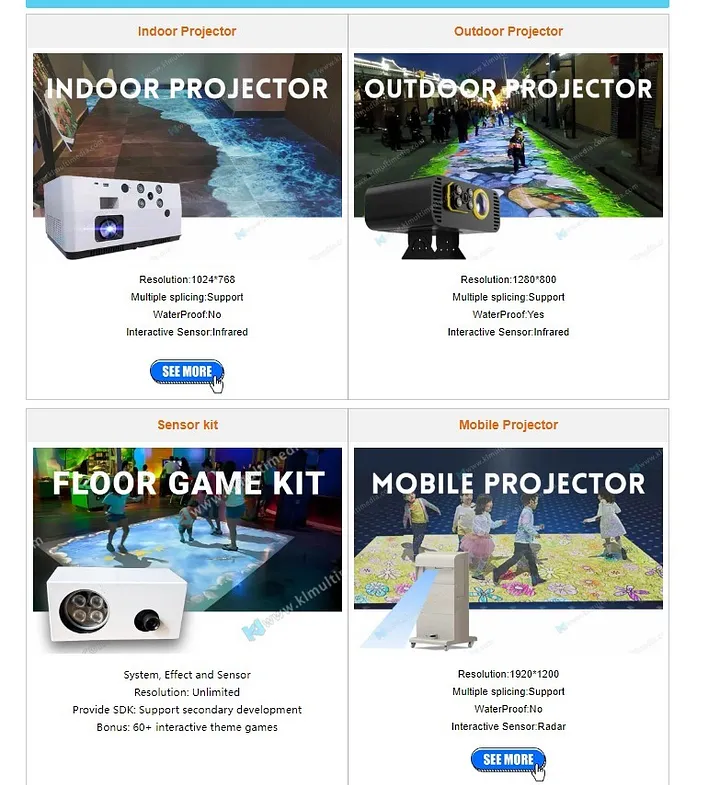
Interactive floor projectors are transforming spaces by blending technology with physical environments, creating engaging and dynamic experiences. From educational settings to commercial spaces, these projectors offer interactive features that captivate audiences. However, assembling an essential kit for an interactive floor projector that fits within a $500 budget requires careful planning and cost-effective choices. This article explores how to achieve this goal without compromising on functionality and quality.
Interactive floor projectors use motion-sensing technology and interactive software to project images, games, or educational content onto the floor. Users can interact with the projections through gestures, creating an immersive and engaging experience. These systems are commonly used in classrooms, museums, retail stores, and entertainment venues to attract and engage visitors.
To create an interactive floor projector setup within a $500 budget, it’s essential to focus on the core components:
1.Projector
2.Motion Sensor
3.Interactive Software
4.Mounting and Installation Equipment
5.Cabling and Accessories

The projector is the most critical component of the setup. To stay within the budget, it’s crucial to find a projector that offers good resolution and brightness at an affordable price. While high-end projectors can cost upwards of $1,000, there are budget-friendly options available that can meet the needs of an interactive floor system.
Recommended Option:
Budget Projector: Look for projectors in the $200-$250 range. Brands like Epson, BenQ, and ViewSonic offer affordable models with decent brightness (around 3,000 lumens) and resolution (720p to 1080p).
The motion sensor is what makes the floor interactive. It detects movement and translates it into actions within the interactive software. Finding a reliable and cost-effective motion sensor is key to keeping the overall cost down.
Recommended Option:
Kinect Sensor: Microsoft’s Kinect sensor, originally designed for the Xbox, is a popular and affordable choice for motion detection. You can find used or refurbished Kinect sensors for around $50-$70.
The software is what brings the interactivity to life. There are various options available, from free open-source software to paid solutions. The choice will depend on your specific needs and the type of interactivity you want to create.
Recommended Options:
Open-Source Software: Platforms like OpenFrameworks or Processing can be used to create custom interactive experiences. These are free and highly customizable, but they require some programming knowledge.
Commercial Software: For those who prefer a ready-made solution, look for software that offers a one-time purchase rather than a subscription model. Options like Intuiface or Ventuz can be found for around $100-$150.
Proper mounting and installation are crucial for the effectiveness of the interactive floor projector. Depending on the space and the type of projector, you might need a ceiling mount or a floor stand.
Recommended Options:
Ceiling Mounts: Affordable ceiling mounts can be found for around $20-$30. Ensure the mount is compatible with your projector model.
Floor Stands: If ceiling mounting is not an option, a floor stand can be used. These are slightly more expensive, ranging from $40-$60.
Cables and accessories are often overlooked but are essential for a smooth setup. floor projector This includes HDMI cables, power cords, and possibly adapters depending on the devices you are using.
Recommended Budget:
Cables and Accessories: Allocate around $20-$30 for HDMI cables, power cords, and any necessary adapters. Generic brands offer good quality at lower prices.
Here’s a sample breakdown to assemble an interactive floor projector kit within the $500 budget:
Projector: $200-$250
Motion Sensor: $50-$70
Interactive Software: $0-$150
Mounting Equipment: $20-$60
Cabling and Accessories: $20-$30
Total: $290-$560
While this budget can vary, careful selection and shopping can help you stay within the $500 limit. It’s also worth considering refurbished or second-hand items to further reduce costs.
Research and Compare: Spend time researching and comparing different brands and models. Look for reviews and user feedback to ensure quality and reliability.
Buy Used or Refurbished: Consider purchasing used or refurbished items, especially for more expensive components like the projector and motion sensor. These can often be found at a significant discount.
DIY Installation: Save on installation costs by doing it yourself. There are many tutorials available online that can guide you through the process.
Utilize Free Software: If you have programming skills, take advantage of free open-source software. This can save a significant portion of your budget.
Conclusion
Creating an interactive floor projector setup on a $500 budget is achievable with careful planning and smart purchasing decisions. By focusing on essential components and considering cost-effective options, you can build a functional and engaging interactive system without breaking the bank. Whether for educational purposes, entertainment, or retail, an interactive floor projector can offer a unique and captivating experience for users of all ages.
content is empty!
Copyright© 2013-2026 KLEADER LTD All Rights Reserved | Sitemap