How to set up indoor interactive bikes
1.How to set up a Bike and Connect Wires?
(Viewing after purchasing kleader bike)
2.How to set up Bike Sensors and Connect Wiring?
(Customer's Self-Prepared Bike Viewing)
3.How to install Bike Software?
4.How to Add Videos?
1.Wiring Diagram

2.Hardware Installation Process
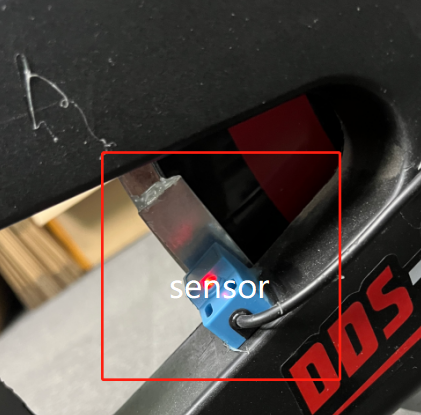
1.Fixing the Bicycle Speed Sensor:
(This step is required for customers to prepare the bike by themselves. For those who purchase the kleader bike, there is no need for installation as it has already been integrated into the interior of the bike.)
1. Each bike needs to have a rectangular magnet and a speed sensor installed.
2. Adhere the magnet to the outer part of the wheel using 502 glue or hot melt adhesive.
3. Attach the speed sensor to the crossbeam using 502 glue or hot melt adhesive (align it with the magnet, ensuring a gap of approximately 5mm between the magnet and the sensor).


2. Button Fixing:
- Secure two buttons as shown in the diagram.

3.Software Testing
1) Connect the serial ports of the speed controller and button controller to the computer one by one and note the corresponding COM numbers in the task manager.
2) Use hidSystem to add the COM types separately.
Add COM: Answer button_COM.
Add COM: Sporty bicycle_COM.
Select the COM number, then view the data.
Check "software start-up" and "palette hidden," exit hidSystem, save the software once, and reopen it.

3) Open KLBicycle.exe to start the game, begin the gaming experience, and use the buttons to control game switching and selection.


